Insulation
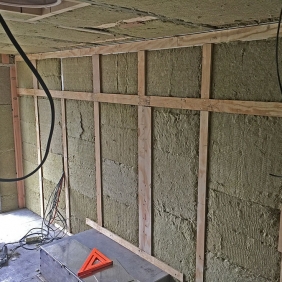
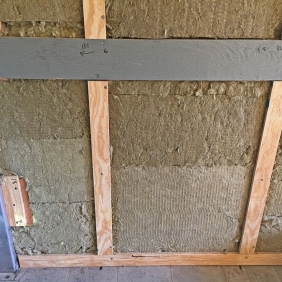
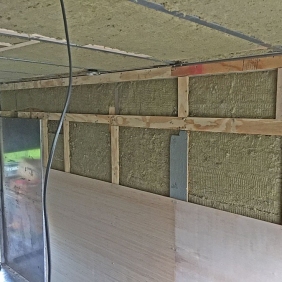
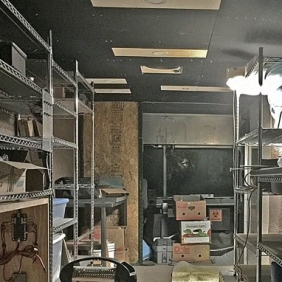
Once you have the electrical wires installed and the hardware attached, it is time to insulate everything. I used 2″ thick Roxul 40 mineral wool. I happened to have a bunch of it on hand, although I would buy it new again if I was doing a new van. Mineral wool is amazing. It is used in high temp furnaces and music studios, and is both thermally and acoustically effective with an R value of 4.2 per inch. It comes in 2’x4′ sheets of various thicknesses and cuts easily with a long blade utility knife. The most common thickness is 2″, but 1″ panels are also available if you need them. Given that the walls of a stepvan are usually 2″ thick, you would probably want that. The panels fit very nicely in between the studs and can be cut to fit exactly.
The popular insulation used in vanlife builds is extruded polystyrene foam such as Owens Corning Formular 150. This comes in a rigid 4’x 8′ sheet. Some nice things about this is that it is very moisture resistant and has a high R value of R-10 per 2″ of thickness. I’m not a fan of this for a couple reasons. Firstly, it is a rigid board and doesn’t bend or flex much. Installation in irregular shapes and surfaces can be a pain. I also don’t like the squeak noise it makes when it rubs against things. Roxul on the other hand is very easy to stuff into cavities and flexes easily with curved surfaces and irregularities. It is also silent. Roxul is mildew resistant, although being porous, it will retain water. To me this is a moot point as I don’t ever plan on water getting inside my van anyway. If it did, I would be tearing things out and fixing the leak and replacing the materials that got wet as I can’t stand the smell of mildew. Roxul 40 is roughly twice the weight of polystyrene foam insulation, but the total extra weight should only be 100lbs or so given the small quantity used.
Roxul doesn’t need any sort of mechanical support or glue to attach it. It just stuffs into place and stays there. Because of this, I recommend cutting it a little bit bigger than the exact opening size, like say 1/4″. This way it is a nice snug fit. It gets secured in place by the wall and ceiling materials as they are installed.
Walls
Here is another place where I differ with what many people are using. A lot of people are using tongue and groove pine to cover the walls and ceiling. Not only is that expensive, it is way heavier than some alternatives. I think that lauan is the way to go, especially if you are trying reduce costs and weight. Lauan is a thin hardwood plywood that is usually used for flooring underlayment. Lauan is the material also used for the interior of commercially built enclosed utility trailers. It is only 5mm thick which is less than a third of the thickness of pine boards. It also is $15 for a 4’x8′ sheet which is way cheaper than boards. I will admit that it tends to be a little flexi compared to the boards, but for the most part, you will be putting racks and cabinets against it and you will not see or notice it. Flexibility is actually a benefit as most vehicles flex a little bit as they move.
Lauan can look pretty good, although you may have to sort through a bunch of sheets at Home Depot to find the prettiest ones. I attached my lauan to the 3/4″ furring strips on the wall studs using screws. You can get fancy looking screws if you care what it looks like. If function is all that matters, a 1″ pan head screw would be fine. You can paint, stain, or polyurethane the lauan if you want to change the look or add moisture resistance. I left mine raw. Sheet stock is dimensionally stable for the most part and doesn’t really require any paint or finish if you don’t want to bother. It also saves on cost.
In my case, I also hung packing / moving blankets on the walls as means to acoustically treat the inside of the van. These work fairly well for that purpose. They are hung on the wall using simple hex screws and grommets that were installed in the blankets. The grommets are 16″ on center with a couple inches leftover on each end. I hung them on the walls first, and then anchored my racks through the blankets which also helps to secure them even further. I did not put blankets behind the rack with the solar gear or the rack for the kitchen counter.
Floor
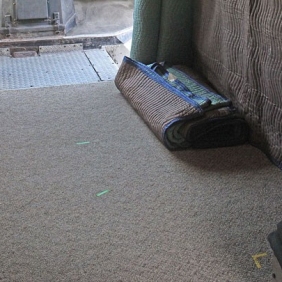
I only have a piece of thin commercial carpet laying on top of the aluminum van floor. I did this because I didn’t want to lose any height from the inside of the van as I am way too close to the ceiling already. Commercial carpet is super thin and has almost no shag or loop. If you are 6′ or under, feel free to put in some insulation and a sub floor. It’s clearly not required as I don’t have it. I will say having carpet in the van makes it feel warmer, although my feet can get cold if it is colder outside. I sometimes rest my feet on a piece of poly foam that keeps them a bit warmer, if I’m sitting at my desk typing for a while.
Ceiling
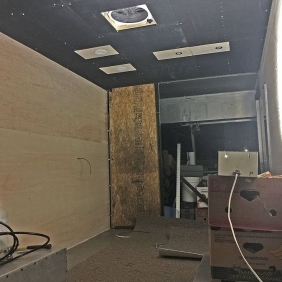
My ceiling is finished a bit different than most. I needed my van interior to be acoustically treated and so I built frames covered with black fabric to absorb sound. My roof insulation is Roxul 40, which is an acoustic absorber, and I wanted it to still be transparent to the space. This was accomplished by building frames out of 3/4″ plywood ripped down to 2″ wide. Each frame is roughly 2’x 8′ and is upholstered in black broadcloth from Joann fabrics. The frames are then screwed to the roof t-bars using a #10 sheet metal screw. The average person does not require this. For most people, I recommend using the same lauan on the ceiling that you use on the walls.
Lighting
When I did the initial build, I was limited in both time and money and was not able to really test any lighting. I just ordered something that seemed to fit and went with it. And….. I pretty much hate it. I have not replaced it yet, but I have located the new stuff that I will be installing. Technically the stuff I have does work, although many of the fixtures do flicker occasionally. I just don’t like the quality of the light.
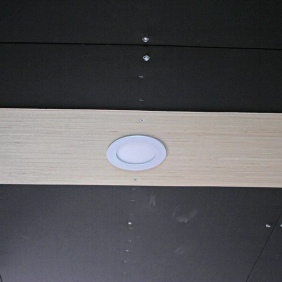
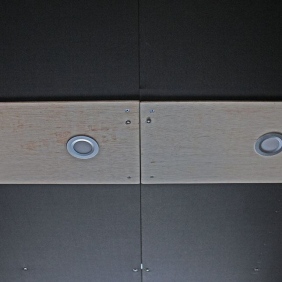
My existing lights are round LED RV lights. They are very thin and are held in place with spring clips. The lights are mounted to small pieces of lauan that are screwed into the ceiling frames. They are better than no light at all, but they could be brighter and more focused. Also, the diffusion kills me.
I am a light snob. I can’t stand bad lighting. Lighting can make all the difference in the world. There is a company that I found that makes high quality LED strip lighting. My future setup will be high CRI warm white strip lighting in deep LED strip light housings with clear or no diffusers, as I like hard down light.
I haven’t thought too much about mood lighting, but there are a ton of LED options for that. At some point I will install some kind of mood lighting, but it’s not high enough on my list at the moment.
Chrome Racks
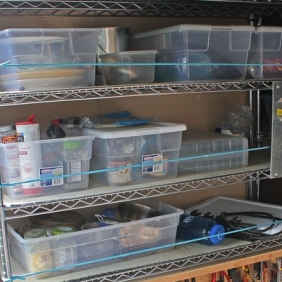
I like organization. I like being able to find things quickly and easily. I have been using chrome racks for storing my stuff for damn near 20 years now. The combination of chrome racks and clear tubs is pure magic for me. I also require storage for a bunch of random stuff like tools and music gear. I already owned my racks and tubs so putting them in the van was a no brainer.
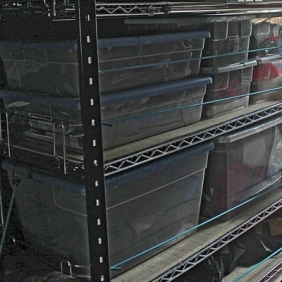
The racks I use are either 18″x48″ or 18″x36″. They consist of four chrome poles that support shelves using a clamshell style wedge at each corner. They are extremely popular and the 48″ ones can sometimes be found at Costco for around $100. The sizing of these racks is great as the specific tubs I use fit very snugly on the shelves and maximize the space. You can adjust the height of the shelves in 1″ increments so that you can also maximize the space used. The weight of the 48″ rack is about 70lbs.
I put the racks down the sidewalls of my van and created a sort of alley in the middle. This worked well for my purposes, but you could place them however you want. My racks are anchored to the sidewalls using electrical EMT one hole strap clamps and lag bolts. You could also anchor them to the floor if you wanted using a screw flange foot. There is a company that sells a ton of accessories for these racks, as well as extra shelves and different sized racks. www.theshelvingstore.com One of the big reasons that I use these racks is that they are infinitely changeable and modular. You can leave big open spaces if needed. You can use the shelves as counters. You can get accessories like cantilever shelves and bars, hangers, hooks. Given that they are steel, you can also solidly anchor and clamp things to them as well to make custom attachments if you want. You can modify them quickly with a grinder or Dremel. Given the way they are made, there are also a ton of hook points for bungee cords.
As much as I love my racks, I must admit that there is a downside. The chrome racks can give off a ringing or singing sound when physically disturbed by banging, touching, or being jostled. This may not be a problem for you, but it drives me crazy. The way that I solve this problem is by cutting pieces of carpet approximately the size of the shelf, and placing them face down on the shelf first. I then set anything on the shelf on top of the carpet. The carpet prevents the small wires on the shelves from vibrating and making any noise.
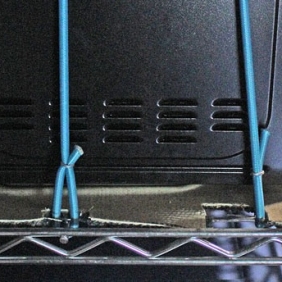
Bungee cords. I like having things secured while I’m driving, yet accessible when needed. Bungee cords help make that happen. They keep things on the shelves, yet easily stretch out of the way so I can have access to them. I keep most things in clear storage tubs. I prefer clear tubs on racks to cabinets because I like being able to see what is in the tubs without having to open doors and hunt for stuff. The size of the tubs are almost perfect in comparison to the shelves. They leave just a little wiggle room for the tubs to move around.
Bungee cord is also called shock cord and comes in different diameters and colors. I used 1/4″ diameter shock cord. You can cut shock cord to custom lengths so that you get the perfect amount of stretch for your application. It is cut using a soldering gun and a special shock cord tip. It is secured in place with hog rings, and is quick and easy to install. I used almost 100′ of shock cord in my build. I sometimes use actual hook ends if I want the cord to be removable, or I will loop it around the post and hog ring crimp it in place. Bungee cord is pretty strong. I use it to secure my 5 gallon water jugs to the wall which are like 40lbs when full. I also use it to secure odd shaped objects like my blankets, pillows, and guitars.
Clear Tubs. I use Sterilite 1644 16 quart clear tubs most. They are approximately 12″ wide and 17″ deep. You can get either 3 or 4 on a shelf depending on which shelf you are using. They are the perfect size for a lot of things. One of them is my medicine cabinet. One of them is my office. One is the spice cabinet. One is just for tea. They are also really good because they trap in smells and tend to keep things fresh due to them being plastic.
I also use a couple other sized tubs. The Sterilite 1659 is a large 56 quart tub that I use for clothes and towels. You probably only need a couple of these. I also have a couple Sterilite 1655 flat 28 quart tubs. It is essentially the same footprint of the 1659, but half the height. These are a good mid sized tub if you have a bigger collection of things to keep together. In general, all of the tubs are some combination of roughly 24″, 12″, and 18″ with varying heights. This makes them fit really well on the shelves. You can even mix and match them pretty well on the same shelf.
Kitchen
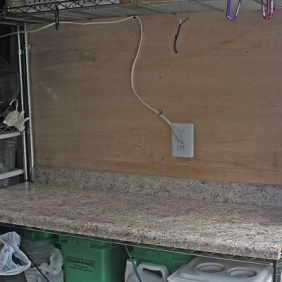
I have a pretty non-traditional kitchen, even for vanlife. I have a modified 4′ kitchen counter top from Menards which was $25. Most kitchen countertops are 24″ deep. I only needed 18″ so I ripped it down to fit the chrome rack shelf that it sits on. It is attached underneath with screws and washers to the chrome wire shelf. I don’t have a sink anymore. I had one initially and didn’t use it, so I took it out. I also don’t have a dedicated stove or cooktop. I have a Gasone portable butane hotplate that I keep stored on a shelf when I’m not using it.
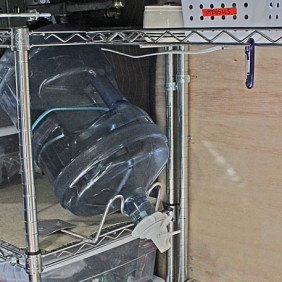
Lest you think I’m some forward thinking visionary, I didn’t really plan on this at all. My original plan was to do what everyone else seems to be doing, which is install a permanent cooktop and sink. I discovered by accident that I didn’t really need either permanent fixtures and could REALLY use a nice 4′ open countertop for other things. It’s great as a work bench. If I had dedicated fixtures, I would not be able to use it for the other stuff. And honestly, it is not a problem to setup and tear down the cooking equipment. It only takes maybe 20 seconds to setup and put away. The hardest part was accepting in my mind that I didn’t really need permanent fixtures. It’s just what we do. It’s how it’s done. Maybe in a house, not necessarily so in a van. I also have a small cantilever shelf above the counter top that I store things like utensils, the junk drawer, tea etc. It also makes a sweet location for installing undercabinet lighting for the counter. I have my water jug placed on a shelf of an adjacent rack at a strategic height in relation to the kitchen counter height. It sits on a frame that is bolted to the rack. The jug itself is bungeed to the frame stand.
I recommend using either propane or butane for cooking appliances. Electric cooking appliances typically draw a lot of energy that is required for the heating element. If you have the extra power, then sure use them. Most people will want to avoid using electric cooking or heating appliances as they will use up the solar power way too quickly. This would mean avoiding toasters, toaster ovens, electric hotplates, electric tea kettles, air fryers, hair dryers, big microwaves, electric space heaters etc. It is possible to use some of the short time high wattage appliances, but you will likely need at least a 3000 watt inverter to really use them, as most heating appliances use roughly 1200-1400 watts. Low wattage appliances that should work fine are things like blenders, mixers, 700 watt microwaves, low wattage crockpots, coffee grinders, and electric shavers. In general, check the wattage of the device in question. Most things under 1000 watts should be fine as long as you aren’t using them for hours in a row. If you will be using things for hours, the wattage should be quite low, like 100-200 watts.
Sleep
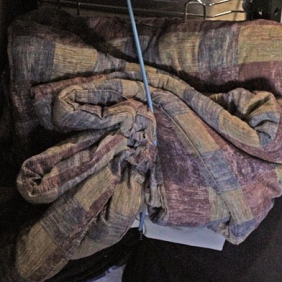
My sleeping setup is also quite different that most vanlifers. It seems as though most people have a permanent sleeping area setup with a mattress. I did not want to dedicate a bunch of space to just sleeping, so I came up with a solution that let me multi-task in the same space. I have an area in front of my desk that I use for both sleeping and playing guitar/ recording / podcasting. I used to have a mattress for a while, but I eventually got rid of it in favor of an EVA foam mat and packing blankets. I have been told it is pretty similar in premise to a traditional Japanese futon setup. I lay it all out on the floor in front of my desk. I do this because I needed something really firm as well as portable and transformable. In the morning, I pack it all up and move it out of the way so that I can use the space for other stuff. It really only takes a minute or two to pack it up or lay it out at night. This also was more of a mental roadblock than a practical one. Who sleeps on the floor without a mattress? Apparently me. And the Japanese. I honestly prefer sleeping on the floor and do so even if a mattress is available. My back is much better sleeping like that. The EVA foam helps to insulate me from the cold of the van floor as well.
Desk
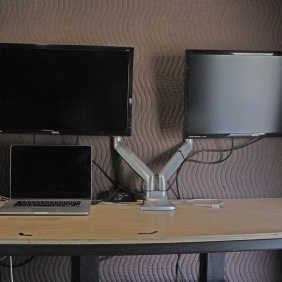
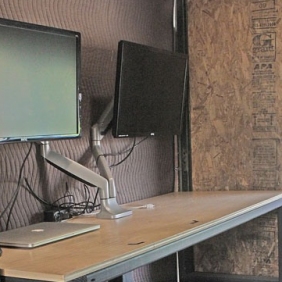
One of my big deal breakers for vanlife was having a full sized normal desk. My desk is custom built out of 2×4’s and plywood so that it is strong, rigid, and lightweight. I built it so that it floats on 2.2lb polyethylene foam for shock absorption from the road. This is the same foam that is often used as packaging material for shipping sensitive equipment. The desk is anchored to the floor using threaded rod with the polyethylene foam sandwiched in between. I did this because I knew that things like computer monitors and laptops don’t do very well with lots of vibration, and it is a relatively easy problem to solve. I also use this foam under my guitars so that they get less road vibration as well. I have a dual monitor stand that is attached to the desk. My laptop is velcroed to the desk and is quite secure.


