The coolest part about vanlife is building your van to fit your specific lifestyle. And while there may be some similarities, no two are ever the same. The world is your oyster when you start with a big open box. I recommend taking ideas and inspirations from other vanlifers and tiny home enthusiasts. The small space limitations are a catalyst for creative problem solving, and there are plenty of problems to be solved. RVs and trailers aside, custom vanlife vehicles are still pretty much the wild west. Vanlife represents a new and modified version of RV living. RV’s seem to try and replicate the house living experience. Vanlife builds seem more willing to abandon typical conventions to maximize space, and find unique ways to get the most out of the small footprint. Vanlife is way more nimble and agile in my opinion. You can feel the minimalism at work in a vanlife build. The small space is required to do many things at the same time, all while still being able to fit into a single parking space.
Planning
You definitely want to spend some time planning your build before you fasten a single screw. If you jump right in and start building, you will almost certainly regret it. Take time to really envision all of the ways that you will want to use the space. Think of all of the options you MIGHT want in the future. Now is the time to plan ahead and run extra wire and backer support when it is cheap and easy. You might not be able to afford things now, but maybe in the future.
Realize that you are going to get some stuff wrong and end up wanting to change things. You have probably never lived in a van before, and therefore can’t really know all of the things that you will want or need. It is literally just your best guess at this point. You will be wrong about some things. You will be right about some things. Do not get upset when you realize in five days that you were wrong about something. The only way to figure it out is to jump in and do it. Because of this, I recommend making your initial build pretty cheap and flexible. I would not spend a ton of money or time trying to build the “perfect” van. How could you even know what that is? You’ve never lived in a van before . I recommend starting with a bunch of assumptions, and installing things in a way that is easy to modify in the future.
The things that seem to matter most to me are having items secured while I’m driving, and then easily accessible and findable when I need to use them. You end up using the same space over and over again for multiple tasks, so it’s important that your work flow is such that you can easily find stuff, use it, then put it back again. Having a dedicated spot or station for specific activities is limited. It needs to be easily flexible.
I feel like I also see complicated and expensive solutions that could be much simpler. Be cautious of overdoing things. You really don’t NEED a lot of things. Don’t feel inferior either if you can’t afford some of the amazing stuff that you see in other peoples’ builds. In most cases, you can add or change things as you go or as money becomes available.
Weight. I don’t see this talked about very much in the vanlife community. In order for the vehicle to drive decently, the weight of the load (your stuff in the back) needs to be balanced. That means that it should be placed in the vehicle in such a way that the approximate weights should be even driver’s side to passenger side. It also means that you should be putting heavy weight in places that don’t negatively affect the vehicle performance. If you can avoid it, do not place heavy objects near the rear of the vehicle, out past the rear tires. Heavy objects in the rear affect the driveability of the vehicle and wear. Ideally, heavy objects would be placed between the rear wheels and the cab. Stuff like solar equipment, heavy tanks or jugs, tools or cargo. In my case, I didn’t have all of the space I needed, so I was forced to put some heavy stuff in the rear. My van is roughly balanced left to right, but there is still more weight in the rear than optimum. I’m not too worried about it, but I will remedy this with a new design in any future builds.
Find the approximate weights of the things that you plan to have in your vehicle. Take your proposed layout and add up all of the weights in that area or section. Try to make sure that you won’t have a ton of weight in any one particular spot. If you do, revise your layout to balance out the heavier loads. Keep changing things until the weights are roughly equal. It doesn’t have to be perfect.
My focus regarding vanlife builds are function, weight, price, and finally asthetic. I see people building out vans with materials that are WAY too heavy. I see people install ceramic tile. WTF? Ceramic tile is really heavy, even in small sections. Sure it might look good, but very impractical. I feel the same way about the wood boards that people often use on the walls. Luaun or 1/4″ hardwood plywood is way better in my opinion. Light, cheap, looks decent and serves the purpose. Cabinets can be really heavy too. I also like modular and changeable because I know that I will probably be making changes in the future. Be really conscious of the total weight of material that you are installing, especially if it is for aesthetic purposes. All of that weight affects how the vehicle handles and the mpg.
Demolition
Unless you buy a new stepvan, there is a good chance that there will be existing fixtures in the cargo area. There is a high probability that you will want to remove these. You may want to keep partition walls that separate the cab from the cargo area. If the roof is not open and there is sheet aluminum on the ceiling, you probably want to take that down and put up good insulation. The insulation that is stock is usually pretty underwhelming. This can be done by removing the rivets that hold it to the roof framing. A 1/4″ drill bit should be sufficient to remove the heads of the rivets and release the sheet aluminum.
Cab
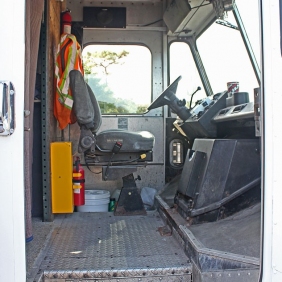
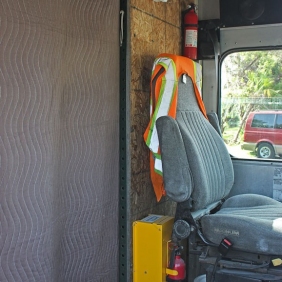
Given that the main strategy being employed is stealth, you might want your cab to look like a work vehicle. Common props used are safety vests, hard hats, clipboards, tools, flashlights, paperwork etc. The dirtier the better. Anything that screams field work is probably good. On the flip side, you might want to not have anything that would raise suspicion like tie dyed anything, a ukulele, or Grateful Dead stickers.
For my van, I use a moving / packing blanket that slides on a piece of unistrut as a curtain that separates the cargo area from the cab area. It works really well. It helps regulate temperatures, keeps down sound and noise, blocks out almost all light at night, and is still easy to slide open and closed for cab access. When it is closed, you have no idea what is going on in the van, either day or night. The blanket is 72″ x 80″ so it leaves a couple inches at the bottom for air to get through if I have the vent fan running. I installed grommets every 16″ on center across the top so that I could mount it. I have a 30″ partition wall behind my driver’s seat that was already installed when I bought the van. There was also a partition wall on the passenger side with a jump seat that I removed during the build. I wanted the extra access to the cargo area and honestly, that jump seat is brutal to ride in. If I have passengers, they just ride in the back anyway.
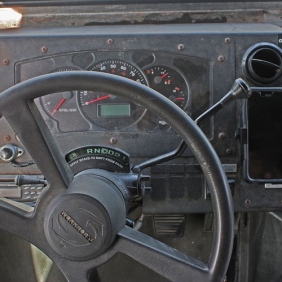
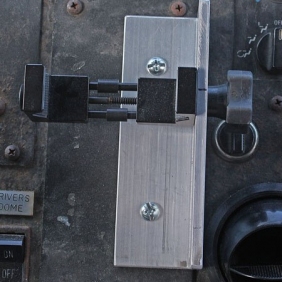
You will definitely want some sort of phone mount for your dash. I use Google maps really often and I need my navigation tool right by me, hands free, while I’m driving. You may need to custom build or modify this if you have a stepvan as there aren’t a ton of options for step van. There should be plenty of room on the dash to fit it in. Also a cup holder is super useful if there isn’t one already. Mill Supply has the perfect one.
Hardware / Mounts
The first phase of construction is installing hardware mounts or brackets for exterior mounted equipment like solar panels, vent fans, antennas, roof racks, etc. You need to do this while the roof and walls are open and you have easy access. Take time and consider ALL of the equipment that needs to get mounted. Really ponder how many solar panels you want to eventually have and their placement in relation to vent fans and such. If you misplace stuff now, you might end up regretting it because you didn’t leave room for things at a later date.
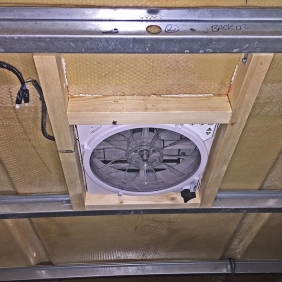
Vent Fan. I have a single Maxx Air vent van. It works great. It is variable speed, reversible, and moves a lot of air. Every once in a while, it trips out and I have to pull the fuse and reset it. Once it is reset, it works normally again. I see people installing two of them, but I don’t think that is necessary. One works pretty well. A second one would just make it harder to place my solar panels on the roof. Maybe if I had a larger van, but given the temps that I follow, a single fan is fine. I would note that I also like warmer temperatures. If you demand that things be super cool, then maybe a second fan is for you. Also realize, a vent fan is only going to move ambient air. If the temp outside is 77F, it can only move 77F air. It is not AC and will never be less than 77F. For the best airflow, I recommend opening up the rear and side doors and letting the breeze blow through. That’s the real magic. The vent fan opening support was framed using ripped down 2×4’s spanning across the roof t-bars. A hole needs to be drilled on the appropriate side of the wood frame to allow for the fan wires to pass through and connect to the power feed.
I have a fiberglass roof and I didn’t feel like it would be strong enough by itself to support and secure the solar panels. I ended up using 2×4 blocking between the metal roof t-bar to anchor the solar panel mounting hardware. The 2×4’s were secured to the roof t-bar using a small L-bracket from Home Depot. I also used some cheap caulk between the roof and the 2×4 to make sure that any gap would be filled and there would be a solid support. If my roof had been aluminum or steel, I would not have needed the 2×4 supports. The solar mounting bracket was then anchored to the 2×4 blocking and was very sturdy and secure.
In general, you need some sort of wood blocking to screw into and anchor things. The aluminum used for the van wall studs is not very good for anchoring as it strips REALLY easy. I mounted 2.5″ wide ripped 3/4″ plywood furring strips to each wall stud using flathead 10-24 screws and nylock nuts. They needed to be predrilled and countersunk which was a little time consuming, but this worked great overall. I also added horizontal strips in specific spots to provide backing to anchor shelves and furniture. The rear end of the van required the most blocking. The corners needed to be framed out as there were no studs on the inside corner at all.
You want to go over the exterior of the vehicle and make sure the doors and hardware are working properly. At this point, it is easy to fix or replace bad hardware because it is easy to get to. Make sure the rear door bumpers are in good condition. Replace them if not. Make sure you don’t have any loose panels or open seams. Replace any rivets if needed.
I see people using sound deadening mat such as Noico or Dynamat. I personally didn’t use any of it in my van, mostly because of cost. That being said, after living in my van a while, I can say that noise can be a bit of a problem even with my well insulated walls and roof. If I was starting all over again and had the money, I would definitely put it on the walls and roof. I may still put some on the sliding door cavity and wheel wells as they can be tinny. If you don’t use it, life will be fine. It will just be a bit noisier. If you’re going to add it, now is the time. DO NOT use roofing ice shield used in residential asphalt roofs. It is a different product and off gasses when it gets hot.
You may want to caulk various seams and joints at this stage as well. Anything that you think would help keep out bugs, water, or weather. Silicone 2 caulk is great, but even Alex Plus is better than nothing.
Wire
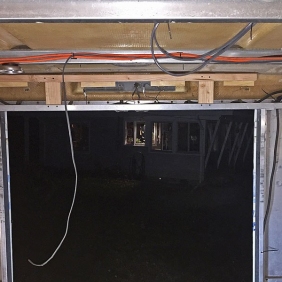
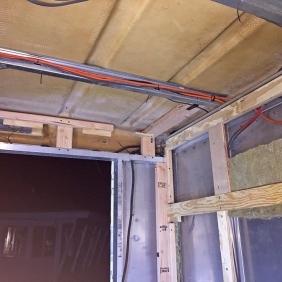
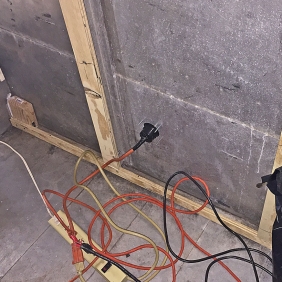
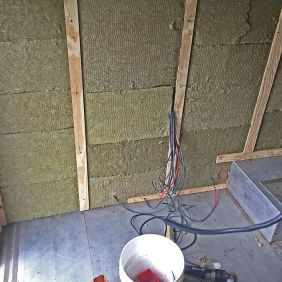
Now is the time to run wire in the walls and ceiling for any electrical that will be needed. Things like lights, fans, solar panel feeds, 12v outlets, 120V outlets, electric cooler feed 12V, furnace. By now, you should know exactly where your solar equipment is going to be located and can safely wire things back to that point. Make sure to leave plenty of extra wire at the solar box end for routing it to the terminal block. An extra 4′ is probably good. Better to have extra and not need it than have it be too short. Leave 18″ extra on the fixture end of the wire.
For the 12VDC circuits, you want to use sheathed automotive wire. It is 2 conductor wire with an outer jacket for protection. It comes in both red/black as well as black/white. Understand here that in the red/black pairs, the red is wired as the positive and the black is the negative. If you happen to end up with black/white pairs, the black will be wired positive and the white negative. Probably best just to stick with red/black as that is the standard for most of the equipment you will be installing. For lighting, you can use 14/2 gauge wire. For higher wattage loads will want 12/2. If you are running wire for an electric cooler, run 10/2. Measure out the approximate lengths of your various circuits including the extra on both ends. Total up that length and add 10% to it. Buy that amount of wire.
The best way to anchor the wire seems to be using tie wraps and tie wrap anchor blocks. They are adhesive backed and stick pretty well to a clean surface. A metal surface is better than wood here. Put at least one self tapping hex head sheet metal screw in the corner to keep it from coming unstuck.
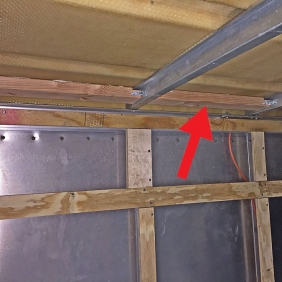
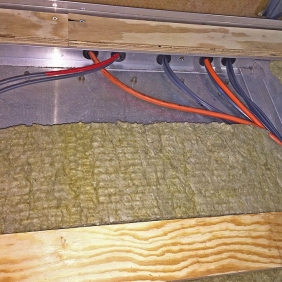
In a stepvan, there is channel that runs along the top of the wall near the roof line for wires and such. This is where you will run your horizontal wires along the walls. It should be big enough to get all of your wires in there. You will however need to drill some holes through the bottom of the channel to allow the wires to travel down into the wall below. You will need to run the wire though the aluminum wall studs / channel in at least a couple places. To safely do this, you will need a rubber grommet. The grommet prevents the sharp aluminum edges from cutting through the cables over time due to the road vibration. The best way to drill the hole in the aluminum studs is using a step bit or uni bit. It takes a little time and effort. Drilling these holes will produce hot aluminum shavings so wear gloves and a long sleeve shirt. You can get rubber grommets at Home Depot. You may need to cut the grommet and snip off a little bit of it to fit it in the hole. Put the grommet in first, then run the wires through it. Clean up any metal shavings before installing the grommet or wires.


